Showing posts with label black. Show all posts

19 June 2015

piCture pOlish Swatch Spam + Color Blocking Nail Art

- PRESS SAMPLE -

Hey guys! Today I've got some swatches to share with you from Australian brand piCture pOlish, which I'm really excited about. I also worked with them to bring you guys an awesome color blocking tutorial, so I'll share their YouTube link along with a photo after my review!

Anyway, today I'm sharing the four shades I used for my nail art look - I just couldn't resist swatching these beauties!


18 June 2015

Mermaid Scale Nail Art + Whats Up Nails Vinyls

- PRESS SAMPLE -

Hello everyone! Today I've got some fun summer nail art to share with you guys - I recently got these awesome scale nail vinyls from Whats Up Nails, and I just had to use them for some mermaid nail art!


16 June 2015

Renaissance Cosmetics Spring 2015 Collection Swatches + Review

- PRESS SAMPLE -

Hi guys! Hope your week is going well so far. Today I'm sharing swatches from the new spring 2015 collection by Renaissance Cosmetics. They are temporarily closing up shop at the end of the month, so make sure you pick up your favorite shades before they sell out!

Anyway, the spring collection consists of eight unique shades:


13 May 2015

Wedding Wednesday: Bold Black + White Skittle

- PRESS SAMPLE -

Hey guys! I've got another Wedding Wednesday manicure for you (yes, I'm actually on time this week!) and today's look is actually pretty bold. I do love black tie affairs, and I love people dressed all in black and white (and ironically, Keith and Ashley's wedding colors are black and white!) so I took inspiration from that color scheme for this manicure, using my brand new Lace Blossom stamping plate from PUEEN.


28 April 2015

SOUFEEL Charm Bracelet Review + Matching Nail Art

- SPONSORED REVIEW. ALL OPINIONS ARE MY OWN. -

Hey guys! I'm really excited about today's blog post because it's a bit different from my usual content. I received a beautiful charm bracelet from SOUFEEL to review, and I decided to do some matching nail art to go with it.

For those of you who do not know, SOUFEEL is an international jewelry brand known for their customizable sterling silver charm bracelets. I had so much fun picking out my favorite charms for my own bracelet, but there are a ton of different styles to suit anyone. Read on to see my picks and get a 5% discount for your own charms!


11 April 2015

Kenya Inspired Nail Art

- SOME PRODUCTS PROVIDED FOR REVIEW -

Hello guys, I hope you are all having a nice weekend so far! Today's nail art is a bit different from usual - a few nail artists on Instagram and myself came up with the idea to post a manicure to raise awareness for the recent tragedy in Kenya. (For those of you who are not aware of what happened, 147 people were killed in an attack on Garissa University College, and hundreds were injured. You can read up on the story here - although this article does not contain graphic images, please be warned that the content may still be upsetting for some.)

To get inspired for this manicure, I looked up some landscape photos of Kenya, and found this gorgeous image of giraffes at sunset, and decided to recreate it on my nails:


04 April 2015

Easter Nail Art: Chevron Chicks

- PROVIDED FOR REVIEW -

Hey guys! Hope you are all having a great weekend so far. I have a quick and easy nail art look to show you today for Easter - something I've seen a lot of artists do, but just had to try for myself as well because they are so cute!


24 March 2015

UNT Black Rockfest Collection Swatches + Review

- PROVIDED FOR REVIEW -

Hi all! Hope you are having a great week so far. Today I've got some swatches to share with you from UNT, that are available internationally from Live Love Polish. These shades are from the Black Rockfest Collection, which features five rebellious glitter top coats.


21 March 2015

Inspired Sunset Gradient Palm Tree Nail Art

- SOME PRODUCTS PROVIDED FOR REVIEW -

Hi guys! I am so excited, because today's post is coming from my new laptop! I am so happy to finally have a new computer, because editing photos had become such a difficult task on my old one. Anyway, today I have some nail art that I just can't wait to show off - I copycatted this gorgeous palm tree nail art by @LetsNailMoscow from Instagram.


10 February 2015

The Digit-al Dozen Does Patterns on Patterns: Houndstooth Florals with OMG Nail Strips

Going right along with Day 2 of the Digit-al Dozen, today's pattern on pattern nail art look is florals on houndstooth print! I achieved this look using nail stickers from OMG Nail Strips as a base, and painting over them with polish. Read on to see my nail art look, and a review of the nail strips!


22 January 2015

Cupcake Polish January 2015: The Queen Collection Swatches

Wow, it feels like it's been so long since I've reviewed Cupcake Polish! I did miss those fabulous holos! Well, today I've got their new collection to show you, The Queen Collection - it consists of five gorgeous holographic shades inspired the queens of Europe throughout history.


This collection features some beautiful and rich shades that are really fit for royalty! The formulas on these are fabulous - most of them were actually opaque in one coat, which you could definitely get away with in real life, but not under my lightbox lamps! Anyway, let's take a look:


We will start with my favorite of the bunch - Eleanor is a black linear holographic polish with an intense duochrome shimmer that shifts from pink to blue. I absolutely love the shimmery color shift in this polish! It's very present but it doesn't overpower the holo, which is nice. Shown above is two easy coats with top coat.


Elizabeth is a sparkly linear gold holographic polish packed with gold shimmer. Nothing too crazy or unique here, but it's a beautifully elegant shade, and it's definitely classic! (You can't have a royal themed collection without a gold polish, right?) Shown above is two easy coats with top coat.


Catherine is a pinky red linear holographic packed with pink shimmer. Again, nothing too crazy here, but it's a very pretty color and the pink shimmer makes it interesting! Shown above is two easy coats with top coat.


Here's another polish that stole my heart - Victoria is a bright, cool toned purple linear holographic polish with a duochrome shimmer that shifts from pink to gold. Seriously, this polish is gorgeous! Even without the shimmer, this polish would make me drool, but when you add it into the equation, it's to die for. I really do love this purple, and it's unlike any polish I have! Shown above is two easy coats with top coat.


And last cut certainly not least we have Maria, a bright royal blue linear holographic polish filled with green shimmer. This is such a pretty shade of blue, and I love the added green shimmer for a totally unique touch. Shown above is two easy coats with top coat.

These polishes are available beginning today on the Cupcake Polish website for $13 USD each, or $60 USD for the entire collection. My top picks are Eleanor, Victoria, and Maria.

Which ones do you like best? I'd love to know!

*Some products provided for my honest review.

PRODUCTS USED:
Base: Nailtiques Formula 2 Plus, available here
Polishes: (listed above)
Top: KBShimmer Clearly on Top, available here

16 January 2015

Bold Dotticure with Glam Polish Hairspray Collection

Hi guys! We interrupt this week of Digit-al Dozen nail art for.. well, more nail art! (I don't know about you guys, but I'm starting to miss swatching! Don't worry though, I've got a ton of swatches to show you guys soon.) The lovely Cristine of Simply Nailogical and I decided to come up with a "bestie twin" manicure using our gorgeous new Glam Polish Hairspray polishes!


And here is what we came up with! To achieve this look, I started with a base of Cuccio 2am in Hollywood, and once that was dry, I dotted on an X with Glam Polish Ladies Choice, Glam Polish Big Blonde & Beautiful, and Glam Polish Hey Mama, randomly on my nails. Then I outlined those dots with more dots, in varying colors! I topped everything off with matte top coat.


The more I do dotticures, the more I'm finding myself liking them! I guess it's true what they say about practice - because I definitely see improvement, although my dots are still not perfect.

I also really loved the look of this nail art with glossy top coat:


With glossy top coat, you get to see all the fun holo shimmer in these gorgeous polishes! (And of course, you can see full swatches here.) I honestly can't decide which way I prefer it - how about you?


I definitely love the contrast between the black creme and the shimmery Glam Polishes (not unlike my recent mermaid dotticure!). I should start mixing finishes more!


Here are the polishes I used. The Cuccio Colour polish is from HB Beauty Bar - don't forget to use the discount code POLISHCHALLENGE at checkout for 15% off your order - and the Glam Polish shades are available on their online shop.

Make sure you check out Cristine's version of this manicure too!

PRODUCTS USED:
Base: Duri Rejuvacote, purchase here

Polish: 
Cuccio Colour 2am in Hollywood, review here
Glam Polish Hey Mama, Glam Polish Ladies Choic, Glam Polish Big Blonde & Beautiful, review here


Top: Glam Polish Magic Shine Top Coat (reviewed here); OPI Matte Top Coat, purchase here

07 January 2015

Valentine's Day Polka Dot Gradient With Essie Winter 2014

It's never too early for a Valentine's Day manicure, right?! Well, today's nail art look isn't just for all you gushy romantics - but the color scheme does fit, so I figured I'd call it that ;) I just loved seeing the Essie Winter 2014 shades together in my swatch post, so I decided to make a quick polka dot gradient with them! This is a look I've done a couple of times before (like on my birthday!) but I wanted to try it with a more elegant color scheme.


I just love how the dots look like confetti! I started with a base of Cirque Carpe Diem (I know, I know, I'm obsessed with it) and then with my double sided dotting tool, I dotted on Essie Bump Up the Pumps, Essie Jump in My Jumpsuit, Cirque Memento Mori, and Essie Jiggle Hi, Jiggle Low - in that order! One of my biggest problems in the past was that I tried layering colors that weren't fully opaque, so this time I chose polishes that were practically one coaters, which I think helped with the ease of dotting. I topped everything off with top coat!


I actually feel like this manicure is perfect for winter - probably because of the cool metallic champagne shade! I think having a different finish in there makes the manicure pretty unique from what I have created before - plus, I think this looks so elegant!


Here are the polishes I used. The Essies are from HB Beauty Bar - you can read my full review and get a 15% discount code here - and you can check out my review of the Cirque shades here.

What do you think of this nail art look? Do you own any of the Essie winter shades?

*Some products provided for my honest review.

PRODUCTS USED:
Base: Duri Rejuvacote, purchase here
Polishes: Cirque Memento Mori & Cirque Carpe Diem, review here; Essie Jiggle Hi Jiggle Low, Essie Bump Up the Pumps, & Essie Jump in My Jumpsuit, review here
Top: KBShimmer Clearly on Top

05 January 2015

NCLA This Party Never Ends Swatch + Nail Art

Happy Monday! I had a lot of fun over the weekend trying out some serious glitter placement - part of me is screaming "never again!" - with NCLA This Party Never Ends.


This glitter has a seriously awesome color combination. Before I start showing you the fun stuff, I have a simple swatch for those of you who aren't interested in spending an hour placing glitter on one nail, haha!


Here's NCLA This Party Never Ends over China Glaze Lotus Begin, with one coat of top coat. I really had trouble deciding what color to layer this beauty over, and I landed on a lavender because I think the colors compliment each other nicely. The formula of this glitter is very thick, but it's easy to apply normally, like any other polish. You might want to dab it on in a few spots to keep parts of your nail from looking bare. Anyway, now for the nail art:


Whew, this was a time consuming look! I started off by painting each of my nails a different color. from right to left: Color Club Factory Girl, Cirque Carpe Diem, Cirque Memento Mori, and I Scream Nails Bubblegum Bang. Then, I taped off triangles on my outer two nails and painted on Memento Mori and Factory Girl. On my detail nail, I carefully placed each glitter with a toothpick. I did the same on my middle finger, then covered another section with Memento Mori. I topped everything off with matte top coat.


I am honestly stunned by how much time that one nail took. I couldn't even imagine doing it to all of my nails! And I didn't even place them to perfectly align - I think that part comes with more practice (which I never want to do! Haha.)


Despite the difficulty, I think that one nail came out looking absolutely awesome and it makes me curious about trying it with different glitters (perhaps bigger glitters next time, so there is less work!)


Here are the polishes I used for this nail art look (yes, I mislabeled the first polish but I didn't save the file! Sorry!). This Party Never Ends is available from NCLA for $18 USD.

What do you think of glitter placement?

*Some products provided for my honest review.

PRODUCTS USED:
Base: Duri Rejuvacote
Polishes: China Glaze Lotus Begin, review here; NCLA This Party Never Ends, $18 USD; Color Club Factory Girl, review here; I Scream Nails Bubblegum Bang, $14.95 AUD; Cirque Memento Mori & Cirque Carpe Diem, review here
Top: Seche Vite; KBShimmer Clearly on Top; OPI Matte Top Coat

30 December 2014

Cuccio Colour Winter Basics Swatch Spam

Hi guys, today I've got for you some Cuccio Colour swatches from various collections that I got from HB Beauty Bar - you already know I love the Cuccio formula and these colors are not only perfect for winter, but great basics to have in your collection for use in nail art.


Like I said, this is a great bunch of basic colors for any serious nail artist, and I love that Cuccio has the wide, flat brushes for easy application. I used a new Essie top coat for these swatches which I didn't like at ALL, but I didn't realize that it translated onto the photos until after I was finished. (I probably should have used the Cuccio Top Coat, which has an incredible shine.) But I will let you know that the cremes were very glossy on their own! Let's take a look!


A Kiss in Paris is the perfect cherry red creme. Everyone needs a shade like this in their collection, and the one-coat formula is fabulous, unsurprisingly. Shown above is two coats and top coat.


Shock Value is a sheer, shimmery iridescent white that sparkles gold in direct light. This is a great color for an elegant winter affair! Shown above is two easy coats with top coat.


Verona Lace is a basic white creme. Oh man, how do I describe this polish? In the endless search for the perfect white creme, I think I've stumbled across a gem in this brand! The formula is not too thick or too thin, easy application, and perfect coverage in two coats. I've already used this polish as a base for nail art! (You'll see the end result of that soon!) I think I'm in love. Shown above is two easy coats with top coat.


And with a perfect white creme comes a perfect black creme, 2am In Hollywood. This basic black has a great formula and applies very smoothly. Shown above is two coats with top coat.


Glasgow Nights is a near-black green creme - no, this isn't the same polish as 2am In Hollywood, although in dim lighting they almost look the same. I wasn't totally sold on this bottle, although I love this dark wintery color, because the formula was patchy. It dried in a weird spotty pattern on the first coat, and there were tiny little spots of pigment visible - all of this was solved with a thick second coat, though, and as you can see in the photo above, the issues aren't visible anymore! It's worth purchasing if you like the color, in my opinion. Shown above is two coats with top coat.


Hong Kong Harbor is a silver foil. Another great basic to have in your collection, and it's fully opaque in just one coat! For the photo above, I used two coats with top coat.


And finally we have Russian Opulence. It's a great basic gold shimmer, and although personally I wouldn't wear it as a full mani because it's a bit yellow for my skin tone, I think this polish will be great for nail art accents and stamping. As is usual for this type of polish, it applied streaky, so you might want to paint one thick coat for full opacity, and a second thin coat to smooth out the streaks. Shown above is two coats with top coat.

Overall, these are some great key colors for your collection, and you can definitely rock them alone all winter long! Cuccio Colour is available from HB Beauty Bar for $8.50 USD per bottle. Don't forget, you can use the code POLISHCHALLENGE at checkout for an additional 15% off your order!

These polishes were provided for my honest review.


28 December 2014

China Glaze Neon Swatch Spam and Nail Art

Hi guys! I hope you all enjoyed the holidays this past week - I took a couple days off from blogging to spend time with loved ones, but I'm back in action today with swatches and nail art using some China Glaze neon polishes from Live Love Polish. I've been pretty obsessed with gradients lately, and triangle cutouts, so I figured I'd combine them for today's nail art look:


I started with a base of Cuccio Verona Lace, a white creme, to make the neon colors pop. Once that was dry I sponged on a gradient of China Glaze Yellow Polka Dot Bikini, China Glaze Son of A Peach, and China Glaze Pink Voltage, all from Live Love Polish. Once that was dry, I applied triangle nail vinyls from Vinyl Boutique and painted on Cirque Memento Mori before peeling off the vinyls.. I finished everything off with matte top coat.


Even though this style is nothing new, I have to say, I am digging the gradient with black! I did wait a long time for the gradient to dry before using the vinyls, though, since there were several layers of nail polish - I believe I waited about an hour - and I think I probably should have waited a little bit longer so I could get cleaner lines, but I am still satisfied with the result.


And I know, this totally isn't seasonally appropriate, but I decided to just run with it! I do love seasonal nail polishes, but I don't think our nails necessarily NEED to be defined by the weather. And hey, it's summer in Australia, right? ;)

Here are swatches of the polishes I used:


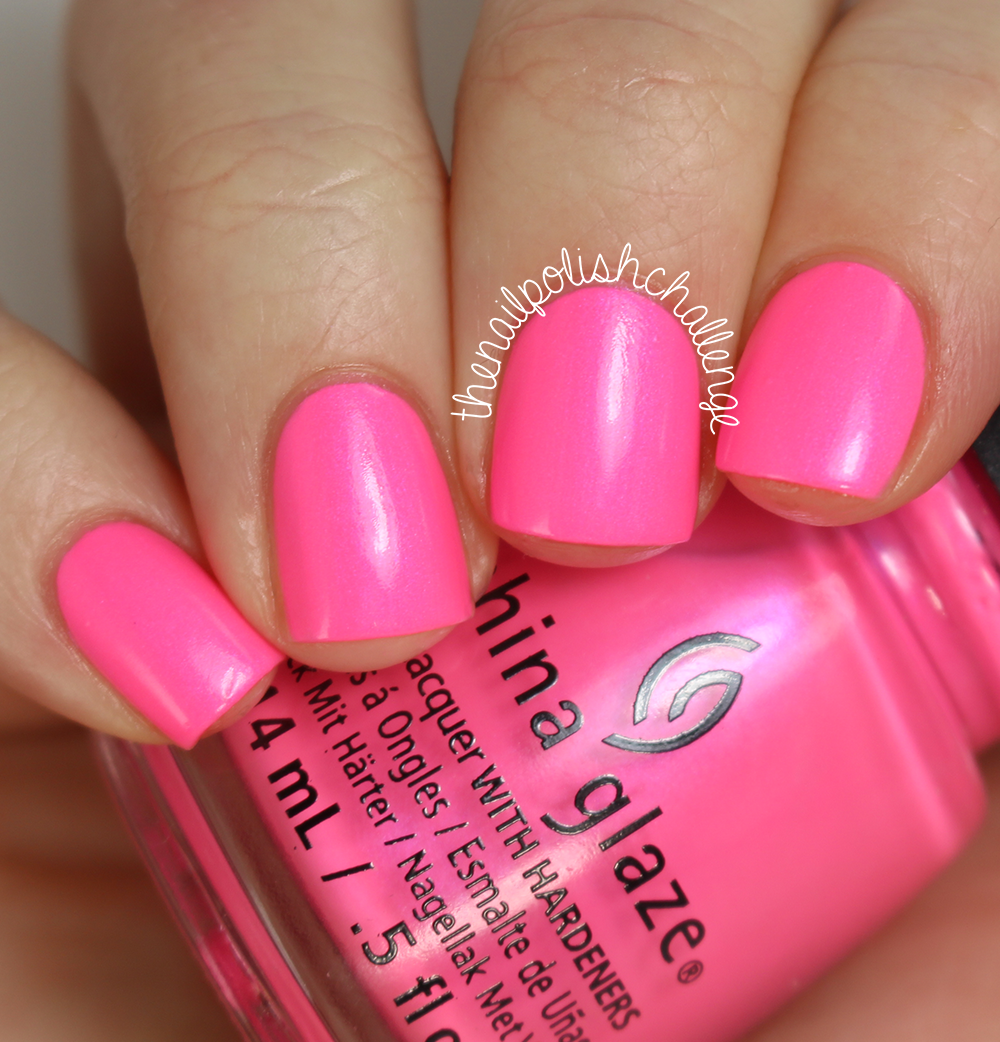
Pink Voltage is a neon pink with a cool toned shimmer throughout. As is usual for neons, this one dried to a slightly matte finish, but I loved how easy it was to apply! Not chalky or difficult at all. Shown above is two easy coats with top coat.


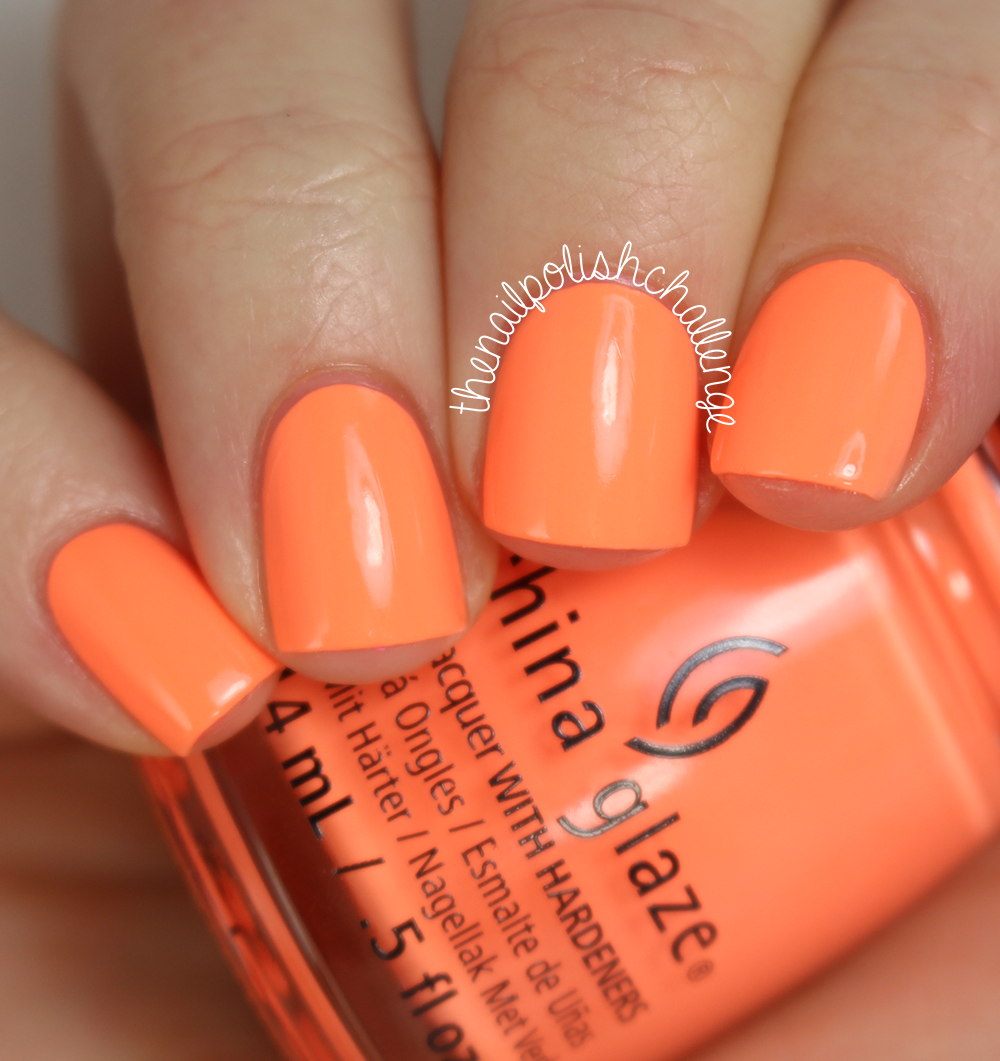
Son of a Peach is a neon peachy orange creme. It is slightly peachier and brighter than in the photo above, but of course, my camera doesn't like neons! Formula on this one was surprisingly thin, but easy enough to use, and again, it dried to a slightly matte finish. I'm glad I finally got my hands on this popular color, because it's absolutely gorgeous. Shown above is three coats with top coat.


And finally, we have Yellow Polka Dot Bikini. Yes, it is that bright! Think "tennis ball" color, only more eye searing! This polish on it's own was too sheer to build to full opacity, so I layered two coats over white for the photo above, along with top coat to shine up the slightly matte finish. Are your eyes burning yet? Haha! This color is perfect for the summer, or if you need to brighten up dull winter days.

The China Glaze polishes are available from Live Love Polish for $7.50 USD each, and you can use the code "INEEDMORENAILPOLISH" at checkout for 10% off your entire order. The triangle nail vinyls are available from the Vinyl Boutique for $5 USD for a sheet of 100.

What do you think of this nail art look? Do you own any of these polishes?

Some products provided for my honest review.

24 December 2014

OPI + Gwen Stefani "Don't Speak" 18K Gold Top Coat

Hi guys! Christmas Eve is upon us, but there's still time to grab some stocking stuffers for your loved ones, right? Well, you won't want to miss this one - Gwen Stefani and OPI have teamed up for a new collection this season, which includes a special edition 18K gold top coat. And I was lucky enough to get this topper from HB Beauty Bar to show you all!


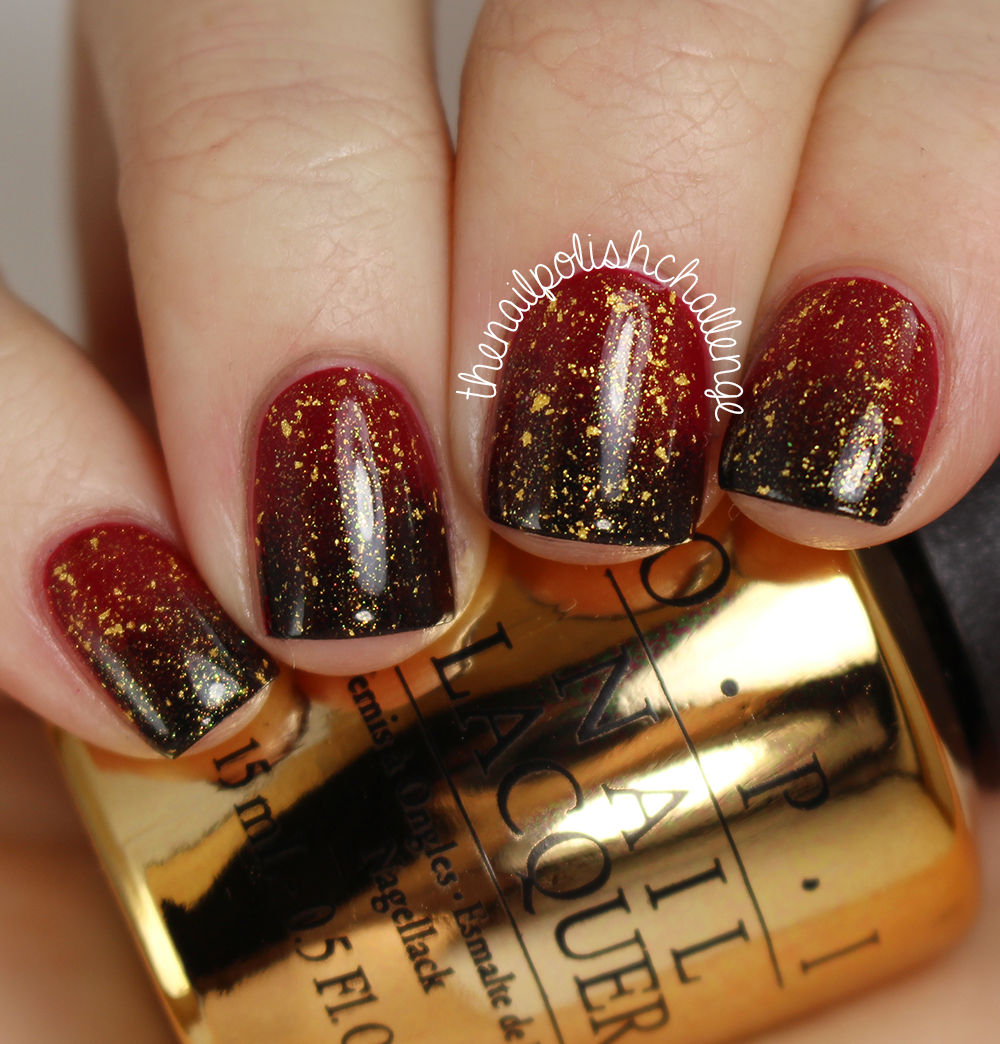
This special edition topper comes in a gorgeous gold chrome bottle and of course, some fancy packaging! I found that this polish was different from other gold flakes I have tried, because this one includes some holographic gold shimmer as well. The formula was great (what else would you expect from OPI?!) and it was easy to apply. Let's take a look:


I couldn't decide if I wanted to wear this topper over red or black, so I decided to make a gradient where you could see it over both colors! I started with a base of Essie Jump in My Jumpsuit (which I reviewed here) and then sponged on Nanacoco Love Black. I topped them off with OPI Don't Speak.


I am totally in love with this combination! You can't really see the holographic sparkle unless you are in direct light (you can see it most on my middle nail in the above photo, but also some faint sparkle on my ring finger).


This manicure was originally going to be what I wore for Christmas because I just love how elegant it looks. I actually might just reapply it for tomorrow!


Here is a visual of all the polishes I used. All of them are from HB Beauty Bar. Don't forget, you can use the code POLISHCHALLENGE for 15% off your entire order, even on the gold top coat!

Overall, I do like this gold top coat. I think it's a wonderful less expensive alternative to some of the other gold flake top coats I've seen - it's only $24.95 USD from HB Beauty Bar! - and I think this bottle is a great collector's item for any nail polish lover.

What do you think of this topper?

*Some products provided for my honest review.

23 December 2014

China Glaze Holiday 2014 Twinkled Collection Swatches

I know, I know - we are cutting it a bit close here, but I've got some amazing holiday swatches to share with you of the new China Glaze Twinkled Collection from HB Beauty Bar! Of course, these polishes all have cutesy names to go with the holiday theme, but a lot of them can be worn well beyond the season because they are just so gorgeous and wintery!


This collection consists of 12 polishes in a variety of finishes, including several glitter toppers. The formulas are typical of China Glaze - easy to work with and great with color payoff. There are a couple of polishes in this collection that aren't too unique, but a few keepers that I will definitely be wearing all winter. Let's get into it:


I'd Melt for You is a bright silver chrome finish polish. This is one of the standouts in the collection for me, although the color isn't too unique, because the formula was wonderfully easy to work with - which is rare for a chrome polish! I'm sure this color is great for stamping. Of course, since it does have the chrome finish, brushstrokes will be pretty visible and you'll want to buff out any imperfections on your nail before you apply. Shown above is two coats with top coat.


Tip Your Hat is a classic winter red creme. Formula was pretty much opaque in one coat, but I used two for the swatch above, along with top coat. Nothing too new or original here, but always a nice polish to have in the collection!


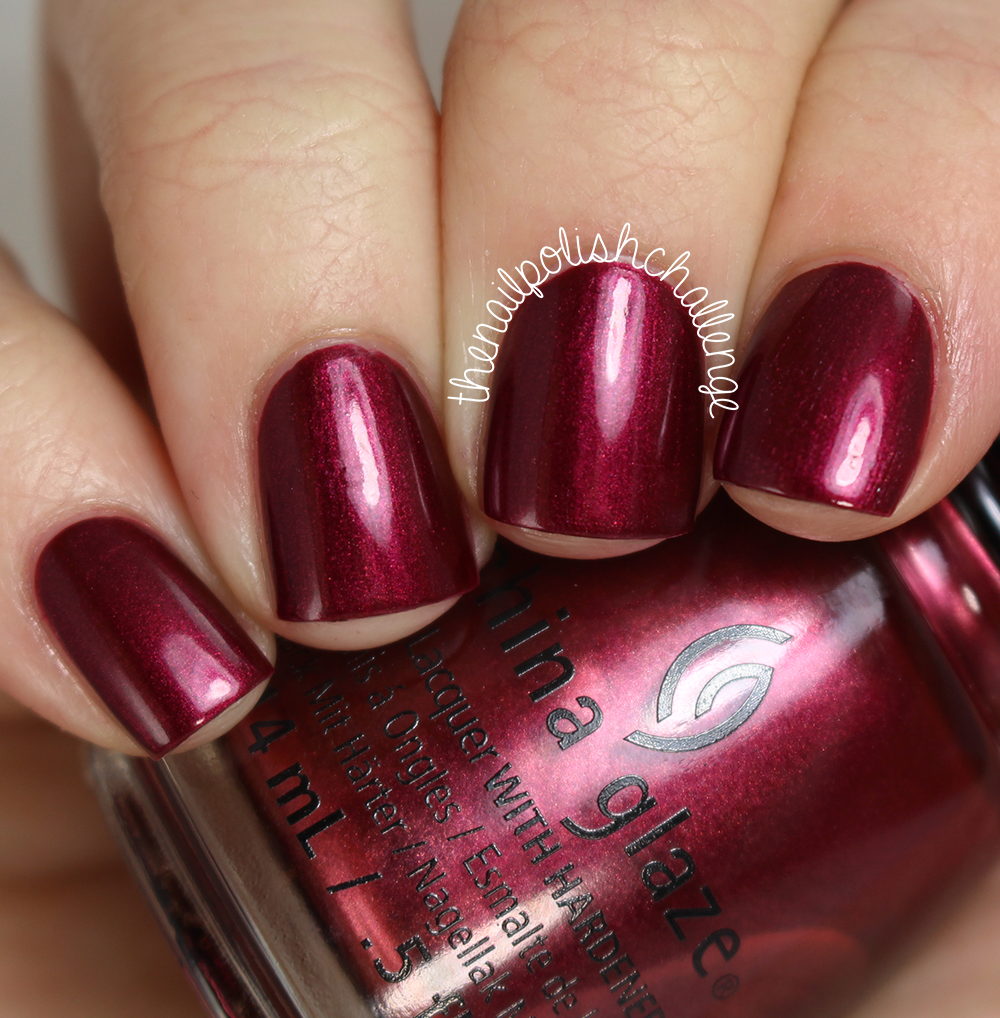
Define Good... is a gorgeous dark red shimmer. I am so attracted to colors like this during the colder months, because they have such incredible depth. This one was incredibly opaque as well - shown above is one thick coat with top coat.


Dancing and Prancing is a glitter topper with a rainbow of metallic hexes. The base of this one looked slightly pink, but it's not visible over polish. Definitely a great color for New Year's! Shown is one coat over Define Good... with top coat.


No Peeking! is another gorgeous shimmer, this time in a warm purple shade. This one was also opaque in one coat, but I added a second to even out the slight streakiness. Shown above is two coats with top coat.


Out Like A Light is a dark gray creme. Nothing too original here, but the formula was fabulous, and opaque in one coat. Shown above is one coat with top coat. (Excuse the bumpiness on my ring finger, my top coat was running out and getting a bit bubbly. No fault of this polish though!)


Meet Me Under the Stars is one of my favorites in the collection, a fully opaque black jelly packed with twinkling silver microglitters. This polish reminds me of a recent vacation I took with my boyfriend - we went to Delaware, and one night we just sat in the middle of acres of farmland and stared out into the starry night sky. I had never seen so many stars before - really as sparkly as this polish! It was stunning, and quite humbling. Looking at my nails with this polish made me think of that very special night, so it's a standout shade for me!  Shown above is two easy coats with top coat.


Feeling Twinkly is a bright blue metallic microglitter. This polish would look great layered over a colored base, but I decided to wear it on it's own, and I love the result. Another great winter shade! Shown above is three easy coats with top coat.


Pine-ing For Glitter is a gorgeous glitter topper featuring green metallic hexes in various sizes. I love the shade of green that these glitters are, and I think they look absolutely gorgeous paired with the dark gray. Shown above is one coat over Out Like a Light with top coat.


De-Light is a sparkly glitter topper packed with holographic gold hexes in various sizes, as well as mini holographic bar glitters. I didn't think I would like this shade too much, but I was pleasantly surprised! I could have packed on the glitter more densely, but I love this subtle glitter look. Shown above is one light coat over No Peeking! with top coat.


December to Remember is a gorgeous icy blue packed with pink and gold shimmer. This is definitely a unique color! I absolutely love all the different flashes of color in this shade, and I think it's perfect for winter. It was a tad streaky, though! Shown above is two coats with top coat.


And finally, we have Chillin' With My Snow-mies, a glitter topper packed with white satin hexes in various larger sizes. I love the end result of this glitter, but application was kind of a pain! I placed some glitters, and then applied a regular coat over them, and it ended up being pretty thick because of the thick glitter base. Either way, it's a pretty funky glitter and it could make for some exciting winter nail art. Shown above over Tip Your Hat, with top coat to smooth everything out.

Overall, there are some serious winners in this collection! I actually ended up really liking most, if not all of these shades, and I definitely want to wear them even after the holidays are over. My top picks are I'd Melt For You, Define Good... , Meet Me Under the Stars, and Pine-ing for Glitter.

These polishes are available from HB Beauty Bar for $5.50 USD each, and you can use the discount code POLISHCHALLENGE at checkout for 15% off your entire order!


Did you purchase any of these shades? Which one do you like best?

These polishes were provided for my honest review.