Showing posts with label 31dc2. Show all posts

14 December 2014

31 Day Nail Art Challenge 2.0, Day 13: Geometric

See, I told you guys I wasn't giving up on the challenge! Today is Day 13 which means geometric nails - another daunting task for a blogger like me, who loves simple nail art! Luckily, I just got in the mail some incredible new nail vinyls from Vinyl Boutique, so I decided to use those for today's manicure:


To achieve this look, I started with a base of Cirque Carpe Diem on my middle two nails (yes, I am obsessed with this flawless white creme - and yes, I've been using it nonstop!), and painted on Essie Strut Your Stuff and Essie Sittin' Pretty on my outer two nails. I stuck on a nail vinyl on my two middle nails once the base color was dry, sponged on a gradient using the same two polishes, and peeled it off to reveal this awesome design! I topped everything off with matte top coat.


I absolutely love how crisp the lines turned out using these vinyls. I probably could have benefited from using another coat of the gradient before I peeled the vinyls off - the polishes I chose were so sheer! Even so, I love how they look and I think these two colors compliment each other perfectly.


I think it's safe to say that I am obsessed with combining soft purples with blues - but who isn't?! I especially love the color that formed where the gradient overlaps.


A bit about the nail vinyls - here is what the sheet looks like. Each nail vinyl sheet from the Vinyl Boutique ranges from $3-$6 USD, and contains ten "strips" for you to apply. But for many of you, you'll find that each strip is big enough for two nails! You don't have to peel off the inside cuts like I did above (I just did that for the photo!), if you start to peel off the vinyl, the inside cuts will stay on the sheet so you are just left with the design.

I found that these vinyls were super easy to use and they left crisp, neat lines. Some vinyls I have worked with require waiting a very long time for your base color to try (even waiting until the next day to apply the vinyls, to keep your polish from peeling up with them!) but these were relatively quick. I believe I waited about 20-30 minutes before using the strips, and they worked perfectly.

For anyone who is interested in learning more about this process, I made a short video on my Instagram page on how to use these vinyls.


Here are the polishes I used. The Cirque polish is available here, and the Essies are from HB Beauty Bar (get 15% off your order with the code POLISHCHALLENGE at checkout!)

The nail vinyls I used are available as a set of ten here for $6 USD.

What do you guys think of Day 13's manicure? Make sure you see what Lindsey and Meghan are up to today as well!


Some products provided for my honest review.

04 December 2014

31 Day Nail Art Challenge 2.0, Day 12: Intricate

Wow, I can't believe it's been almost two months since I last posted a challenge manicure! It was a much longer break than I anticipated, but life got in the way and I had a ton of swatching to do. Plus, today's theme was the most daunting yet - intricate nails?! If you have been following me for any length of time, you know that "intricate" isn't a word you can use to describe my nail art. So of course, I held off on doing my intricate nail art for as long as possible, but I finally had to face my fear of doing freehand nail art and came up with this:


When I saw this beautiful pattern  by Charuca, I just knew I had to try it on my nails (and that I could possibly pass it off as "intricate"!) To get this look, I started with a base of Cirque Carpe Diem, and then using a nail art brush and a dotting tool, I made my floral pattern with Zoya Cole, Zoya Rocha, Zoya Tilda, and Zoya Ryan. I mattified my nails to make the design easier to see!


Although my freehand skills leave a bit to be desired, I absolutely love the color scheme of this manicure and I would love to revisit it! Maybe I need to trim my brushes so I can achieve more precise designs!? How do you find success in doing detailed nail art?


Anyway, I will hopefully be back on track with the challenge now, since the swatching rush has eased up (but don't worry, I will always have a ton of swatches for you guys!) Too bad an equally frightening theme is up next - geometric nails!! I will have a field day with those! At least I will be getting back into more serious nail art, which I have missed doing.


Here are the polishes I used. You can purchase the Cirque here and the Zoyas here.


04 October 2014

31 Day Nail Art Challenge 2.0, Day 10: Animal Print

Hello everyone! Today is the tenth day of the 31 Day Nail Art Challenge 2.0, which means animal print! (Well, I'm a couple days late. But still!) Of course, the first thing I always think of with animal print is leopard print... and the second thing is zebra stripes. And I didn't want to do something I had done so many times before, so I tried to think of another animal print, one that I had never tried. So I came up with... snake skin!


To get this look, I started with a base of Essie The Perfect Cover Up. Then, I sponged on random sections of Essie Fall in Line and China Glaze Tongue & Chic (I know, I know, I have been reusing a lot of the same colors lately. But they are so perfect for autumn!) Then, I actually cut a bit off my loofah and taped it onto my nails, and sponged Essie Good as Gold over it. When I peeled off the loofah, I had this cool design! I topped everything with top coat.


I think a lot of the detail of the background colors got lost as soon as I added the bright gold polish. You can see hints of the shimmer in between the gold snake print, but it's not too noticeable!


Still, I am pretty satisfied with this design and I love the color scheme. I am actually really impressed that this technique worked! I wish I could credit whoever came up with this loofah technique, but I have seen it around on Pinterest so many times, and it never seems to link back to the nail artist. So if you know, send me an email!


Here are the colors I used. Oh man, look at how much of Essie Fall in Line I have already used! I am obsessed with that gorgeous green this season. Anyway, all of these polishes are available from HB Beauty Bar.

What do you think of this manicure? Make sure you check out Lindsey and Meghan's challenge manicures below!


29 September 2014

31 Day Nail Art Challenge 2.0, Day 9: Stripes

Hi guys! Wow, we are already almost a third finished with the 31 Day Nail Art Challenge 2.0, and I'm pleasantly surprised. Last year doing the challenge, I was feeling overwhelmed even though I only participated twice a week. This year, I'm pretty confident in my timing, and I think although I am doing mostly simple work, I am coming out with some of my favorite manicures already. I can't wait to see what else this challenge has in store for me. Anyway, today is stripes, so I decided to go with some of my new Essie Fall 2014 polishes (which as you all know, I am pretty obsessed with).


To achieve this look, I started with Essie Find Me an Oasis, which is a super light, almost-white blue. Then, I used nail vinyl decals from KBShimmer to tape off lines, and paint on Essie Fall in Line and Essie The Perfect Cover Up. Then, I peeled off the tape, fixed up the edges with a striper brush, and topped everything with top coat.


I'm a little disappointed with the rough lines here, and I think it would have ended up being neater if I just used striping tape. For whatever reason, I struggle a lot with nail vinyl decals. They just don't work that well for me! Does anyone have any tips?


Even though the lines are choppy, I do love the colors I chose for this manicure and I love the cool toned scheme. It feels very fall appropriate!


Here are all the polishes I used. They are all from HB Beauty Bar - you can use the code POLISHCHALLENGE for 15% off your entire order from them.

What do you think of today's challenge manicure? Don't forget to check out the InLinkz below to see what Meghan and Lindsey come up with!


22 September 2014

31 Day Nail Art Challenge 2.0, Day 7: Metallic

So, today's challenge prompt is "metallic", which is a prompt I always get a bit nervous about. There are so many cool ideas that involve metallic nail polish, but they are generally too advanced for my skill level, or I just don't have the right tools to create them! Anyway, for today I settled on a dry brush manicure using the same technique as my grungy French tips.


To create this look, I started with a base of Cult Cosmetics DTLA, and then with hardly any polish on the brush, I dabbed on China Glaze Tongue & Chic, China Glaze Don't Make Me Wine, and Essie Nothing Else Metals. I love these colors together, and I think it looked so cool in real life, but the photos didn't show it so well - so I took some macro shots for you to get the real beauty of this technique!


On the left is an extreme close up of the polish on my middle finger nail. (You can click on this image to enlarge it more!) It almost looks like snake skin up close, doesn't it?!


I really love how subtle the teal and pink are in this manicure. I think they go really well with the metallic purple - I believe it's my first time using that metallic color from Essie, and I'm glad I bought it!


Here is a visual of the polishes I used:


The Cult polish can be purchased here (use the code KELLI for 15% off), and the China Glaze and Essie polishes can be purchased here (use the code POLISHCHALLENGE for 15% off. Don't I always hook you guys up with coupons?! Haha.)

As always, please check out the other talented ladies I am doing the challenge with!


Some polishes in this post were provided for my honest review.

18 September 2014

31 Day Nail Art Challenge 2.0, Day 6: Monochromatic! featuring Cult Cosmetics

Hey guys! I know it's sort of late, but I am still on time for Day 6 of the challenge! Today's prompt is "monochromatic", and I was really stumped, so I decided to go with a simple abstract French tip manicure using some pink polishes from Cult Cosmetics. I fell in love with these polishes, so I just had to swatch them, too - read on for a 15% off coupon to Cult!


So, I know this look might not seem monochromatic, because I included the metallic accent, but this polish actually has a definite pink tone to it (you'll see in my swatch!). Anyway, I started off by painting on two easy coats of Cult Cosmetics Belmont Shore, and then, with a striping brush, I freehanded on Cult Cosmetics Los Feliz and Cult Cosmetics Abbot Kinney. I topped it all off with top coat.


I'm totally loving these colors together, even though this design is really simple. It was nice to see that I am capable of making straight lines without tape, though!


Anyway, I used all Cult Cosmetics polishes for this look, and they all had an incredible formula, so I decided to swatch them as well:


Belmont Shore is a bright, slightly cool toned Barbie pink cream. This one is almost a one coater! I love how smooth and glossy this formula is as well - I definitely didn't need top coat for this one because it was so shiny, but I ended up adding it out of habit. Shown above is two coats with top coat.


Abbot Kinney is a gorgeous metallic foil with a pink tinge to it. I didn't expect to love this one as much as I do, but I think it looks fantastic on my nails, and I think it's a great foil for autumn. Shown above is two easy coats with top coat.


Loz Feliz is a gorgeous maroon cream. Again, what a perfect color for fall! I can't get enough of these dark colors for the colder weather, and I will definitely be reaching for this one a lot this season. Shown above is two coats plus top coat.

I love the formula on all of these polishes, and I am glad that the caps can be pulled off for easy application. I can't wait to try out more Cult Cosmetics polishes. All of these colors can be purchased from Cult Cosmetics for $9.99 USD each, and you can use the code KELLI at checkout for 15% off your entire order!

Make sure you check out what the other talented ladies created for Day 6 of the 31 Day Nail Art Challenge 2.0!


15 September 2014

31 Day Nail Art Challenge 2.0, Day 5: Black and White

Today is Day 5 of the 31 Day Nail Art Challenge 2.0, and that means black and white nail art. I decided to keep it simple with some yin yang nails, something I have never done before but always wanted to!


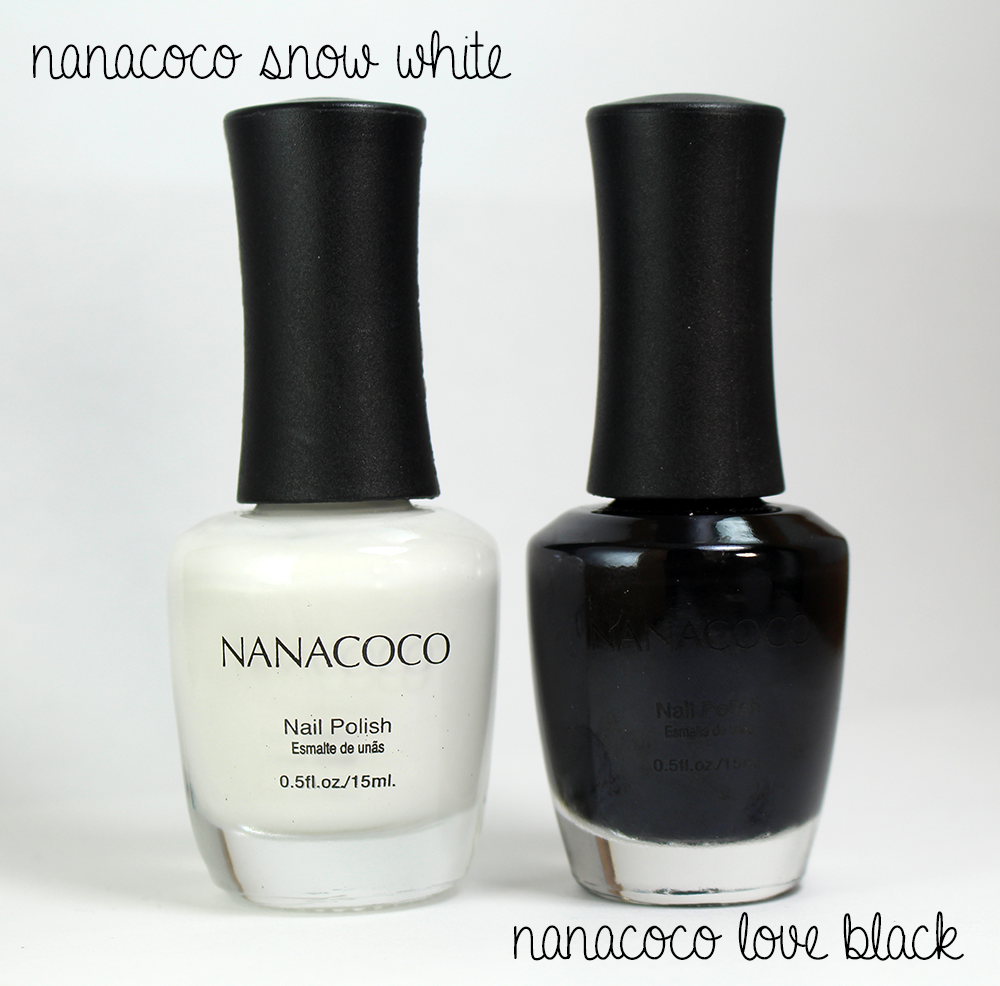
For this nail art look, I used all Nanacoco polishes from HB Beauty Bar. I started with a base of Nanacoco Snow White, and once that was dry, I took a small nail art brush and drew on the black "yin" with Nanacoco Love Black. Then, I used a dotting tool to create the large dots within the yin yang.


When I was creating this look, I actually read a bit into yin yangs, so I wouldn't get the order wrong (white over black, as opposed to black over white!) and I thought it was really interesting. The yin yang symbol represents how opposites are actually complementary, and that one extreme cannot exist without the other (for example, good cannot exist without bad.) It's quite beautiful, if you think about it! I won't bore you with the details, but you can read more here.


Here are the polishes I used for this manicure. As I mentioned, I got both of these from HB Beauty Bar. Nanacoco is a great brand, and at $3 USD per polish, they're ridiculously cheap! You can get these and more for 15% off with the code POLISHCHALLENGE.

Make sure you check out Lindsey and Meghan's manicures for Day 5 as well! What do you think of this manicure?


These polishes were provided for my honest review.

11 September 2014

31 Day Nail Art Challenge 2.0, Day 4: Primary or Secondary

Hey guys, it's Day 4 of the 31 Day Nail Art Challenge 2.0, and whew! Today's nail art prompt was "primary or secondary" color scheme, which was NOT easy to come up with! But, I am pleased with what I came up with, and I'm happy to say I'm not burnt out just yet (although I have a feeling that these challenges are just going to get harder and harder, haha.) Anyway, I decided to stick with a primary color scheme, which consists of red, yellow and blue. And what better manicure to do than one inspired by a childhood classic?!


That's right, I decided to do nail art inspired by the children's book, Mouse Paint! For those of you who didn't read it, this educational book is the story of three white mice who find three jars of paint (red, yellow, and blue) and learn to mix different colors with them. What a cute story, right? Here is the cover, for reference:

Source

I'm actually pretty pleased with how these turned out, and I'm glad that they somewhat resemble the cover of the book, haha!


Anyway, to achieve this look, I started with a base of OPI Put A Coat On, which is a white base for neon nail polishes. (But it's a perfect creamy white for nail art too!) I painted the mice and their scribbles with acrylic paint, and topped everything off with matte top coat.


To create thin and (somewhat) precise lines, I used my new nail art brush set that I got for review from Bundle Monster. The set comes with 20 pieces in total - 15 brushes, and five assorted dotting tools. I used a few of the thin nail art brushes, as well as a dotting tool, for the manicure above.


Here are just a few of the brushes that come in the set. There's even two fan brushes! You can use these for glitter nails, flocking powder, or just creating an interesting grungy manicure. There are also stripers, flat brushes, and small detail brushes.


And here are the dotting tools, which have these cute wooden handles. All the dotting tools are double sided, so it's like getting ten dotting tools! (Note: my brown cardboard light box made the reflection of these tools look rusty, but I assure you, they are totally silver and brand new!)

This 20 piece nail art set is available at Bundle Monster's online shop for $13.50 USD and comes with its own little pouch for storage. Be sure to check out their social media links (below the challenge linkup) to follow them for news and promotions.

What do you think of my Mouse Paint nail art? Do you remember this book?


Bundle Monster social media links:


Some products were provided for my honest review.


08 September 2014

31 Day Nail Art Challenge 2.0, Day 3: Blue or Violet

Hello guys! I've got another nail art look for you from the 31 Day Nail Art Challenge 2.0. Today's prompt is "blue or violet", and I just couldn't decide - I love both of those colors when it comes to nail polish, so I decided to incorporate them both in my Day 3 manicure.


Let me start by listing my inspiration for this design. I saw this absolutely adorable raspberry nail art look from Fall in NaiLove, and I instantly knew I wanted to recreate it. I figured that I should pick my own fruit to copycat the design with, so I went with blueberries and incorporated the purple background to really make it fun!


I started with a base of China Glaze Lotus Begin on all nails. This is probably my favorite purple polish! Then, using these brushes from Born Pretty Store, I painted on half circles with OPI Put a Coat On, and then smaller half circles with Essie Strut Your Stuff. The black outlines were created with acrylic paint. And of course, I topped everything off with top coat!


I will admit that I think this nail art is a bit strange! But I ended up really liking the unique color combination, and I think the cartoony feel matches the color scheme well.


I really think I need to step up my game for the rest of this challenge, but at the same time, I don't want to burn out too soon, so I guess I will just have to see where the next day takes me. I have to admit though, I am starting to get more comfortable with painting freehand, even though I have only done a few manicures so far!


Here are the colors I used. Yes, OPI Put a Coat On is technically a base coat - it's a super opaque white for wearing under neon polishes. I figured it would work well in nail art, and I was right!

I actually got all of these colors from HB Beauty Bar. You can use the code POLISHCHALLENGE at checkout for 15% off your entire order!

What do you think of my blueberry nails? Don't forget to check out the other talented ladies taking on the challenge: