Hello guys! It's another snowy day here in New Jersey, and I've got the day off from work - so it's a great time to catch up on blogging. Today I've got the latest Metropolis shades to show you from Cirque Colors, as well as an easy nail art look using them!
As you may remember, the Cirque Metropolis collection is an ongoing collection with new releases every month. This month's colors are two gorgeous shades of blue, and when Cirque posted an adorable blobbicure on their Facebook page featuring both shades, I just knew I had to recreate it:
Showing posts with label tutorial. Show all posts
05 March 2015
23 July 2014
Confetti Dotticure Nail Art (and Tutorial!) with Essie
Hiya guys! I've got another tutorial for you today, this time for my confetti-like dotticure nail art that I did for my birthday a couple of weeks ago!
This time I decided to go with a rather funky color scheme using all Essie polishes, but the design is still using the same technique :)
Check out the video here! (or, watch it on YouTube):
What tutorial would you like to see next?!
This time I decided to go with a rather funky color scheme using all Essie polishes, but the design is still using the same technique :)
Check out the video here! (or, watch it on YouTube):
What tutorial would you like to see next?!
16 July 2014
Easy Watermelon Nail Art and Tutorial!
Hi guys! I hope everyone is having a nice week - personally, I've been curled up on the couch reading my new Game of Thrones books, so I haven't given myself any time to paint my nails! (If any of you watch the series or read the books, you'll know why I can't put them down! Haha.) Anyway, I'm back with another summery nail art tutorial - this one is really simple, and the detail nail is inspired by my recent nail art swap with Magnifique Nails.
I decided to keep the other nails simple, so even a beginner could easily follow this tutorial. All of the polishes used and nail art brush details are in the video, as well as the video description.
Here is the tutorial video (or, you can watch it on YouTube here!):
What do you think? What nail art look would you like to see in a tutorial?
I decided to keep the other nails simple, so even a beginner could easily follow this tutorial. All of the polishes used and nail art brush details are in the video, as well as the video description.
Here is the tutorial video (or, you can watch it on YouTube here!):
What do you think? What nail art look would you like to see in a tutorial?
06 July 2014
Gradient Nail Art and Video Tutorial
Hi guys! I hope everyone had a great weekend. I've got some exciting news - I (finally!) made another YouTube video! After about a year of no videos, I decided it was about time to start making them again (although the old videos are no good, you've been warned! I hope to eventually delete the old ones and remake the tutorials with new helpful tips and hints.) Anyway, here is the manicure I created:
I decided to go with a simple gradient, because it seemed like a relatively easy first video to start with - and people always ask how I make them! Of course, there is definitely a learning curve to painting your nails on camera, so I will have to practice a bit more, but the video does show exactly how I usually make gradients. I used China Glaze Wait N Sea and China Glaze I Sea the Point from HB Beauty Bar for this gradient. (I wanted to use the same color scheme as my recent sailor skittle manicure.)
Well, let's get to the video! Or, click here to be redirected to the video on YouTube.
Let me know what you think of my first tutorial! And if you have any requests for future tutorials, comment or send me an email :)
I decided to go with a simple gradient, because it seemed like a relatively easy first video to start with - and people always ask how I make them! Of course, there is definitely a learning curve to painting your nails on camera, so I will have to practice a bit more, but the video does show exactly how I usually make gradients. I used China Glaze Wait N Sea and China Glaze I Sea the Point from HB Beauty Bar for this gradient. (I wanted to use the same color scheme as my recent sailor skittle manicure.)
Well, let's get to the video! Or, click here to be redirected to the video on YouTube.
Let me know what you think of my first tutorial! And if you have any requests for future tutorials, comment or send me an email :)
20 June 2013
Leopard Print Nail Art Tutorial
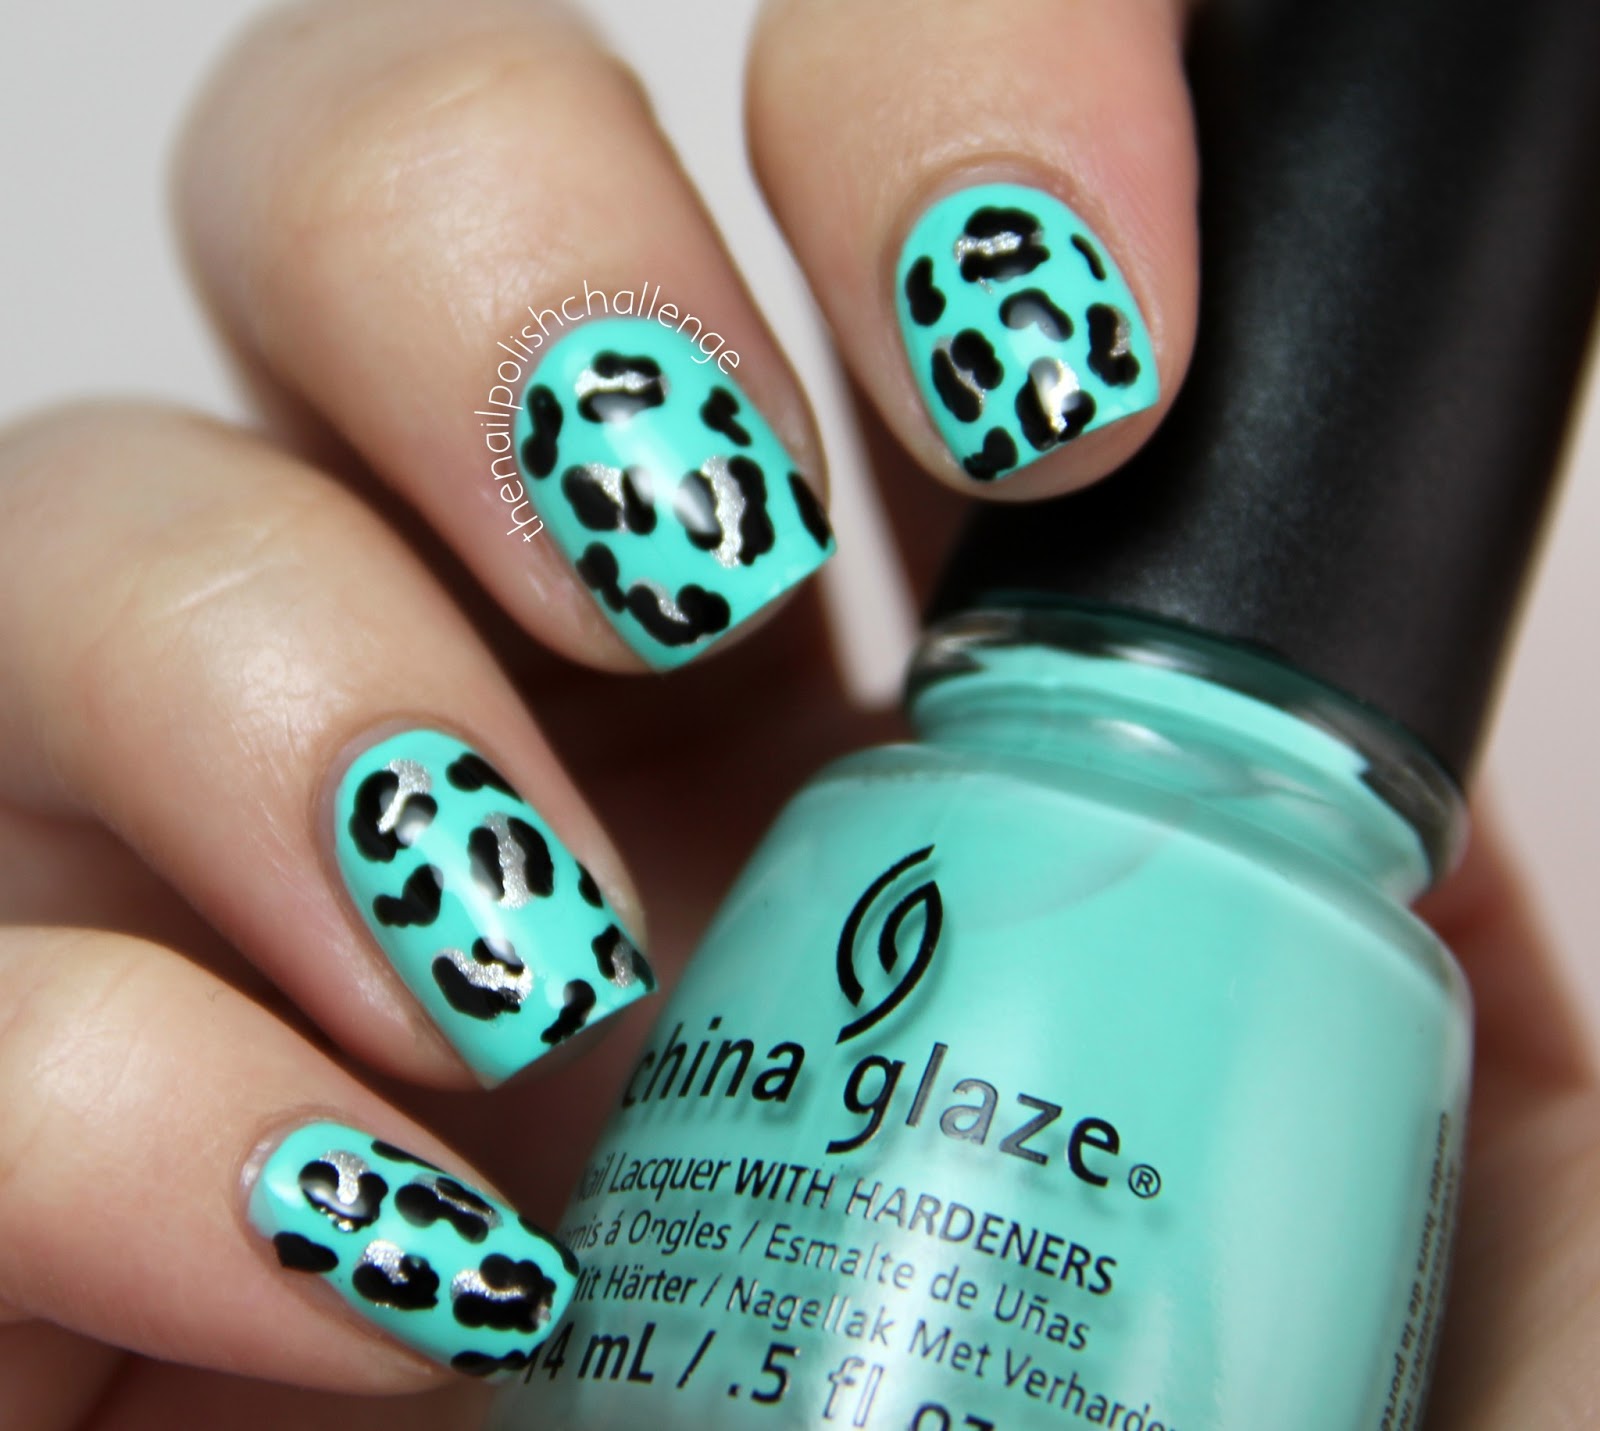
Today I have another tutorial for you guys on how to do leopard print nails!
Here is the manicure I created. I used China Glaze Too Yacht to Handle as a base color.
You can get the dotting tools here. Use the code RFL91 at checkout for 10% off your order and free shipping.
Watch the tutorial:
Here is the manicure I created. I used China Glaze Too Yacht to Handle as a base color.
You can get the dotting tools here. Use the code RFL91 at checkout for 10% off your order and free shipping.
Watch the tutorial:
30 May 2013
Water Marbled Nails Tutorial!
Som of you may know that I uploaded a tutorial video on Youtube a couple days ago, and I had so much fun making it that I decided to make another one!
Today's tutorial is on water marbling. So many people ask me how to do this - there are a lot of great videos online, but I wanted to explain each part of the process so I made my own!
Here is the water marble I did for the tutorial. I used a base of OPI My Vampire Is Buff, and marbled with ORLY Snowcone, ORLY Gumdrop, and ORLY Powderpuff.
I hope my video helps you in making this cool design - if you like this video and want to see more, be sure to subscribe to my channel on Youtube!
Today's tutorial is on water marbling. So many people ask me how to do this - there are a lot of great videos online, but I wanted to explain each part of the process so I made my own!
Here is the water marble I did for the tutorial. I used a base of OPI My Vampire Is Buff, and marbled with ORLY Snowcone, ORLY Gumdrop, and ORLY Powderpuff.
I hope my video helps you in making this cool design - if you like this video and want to see more, be sure to subscribe to my channel on Youtube!
11 February 2013
Feather Nails
Today's manicure is only one photo, because superstorm Nemo has really destroyed my cuticles! I have been doing so many childish activities in the snow :)
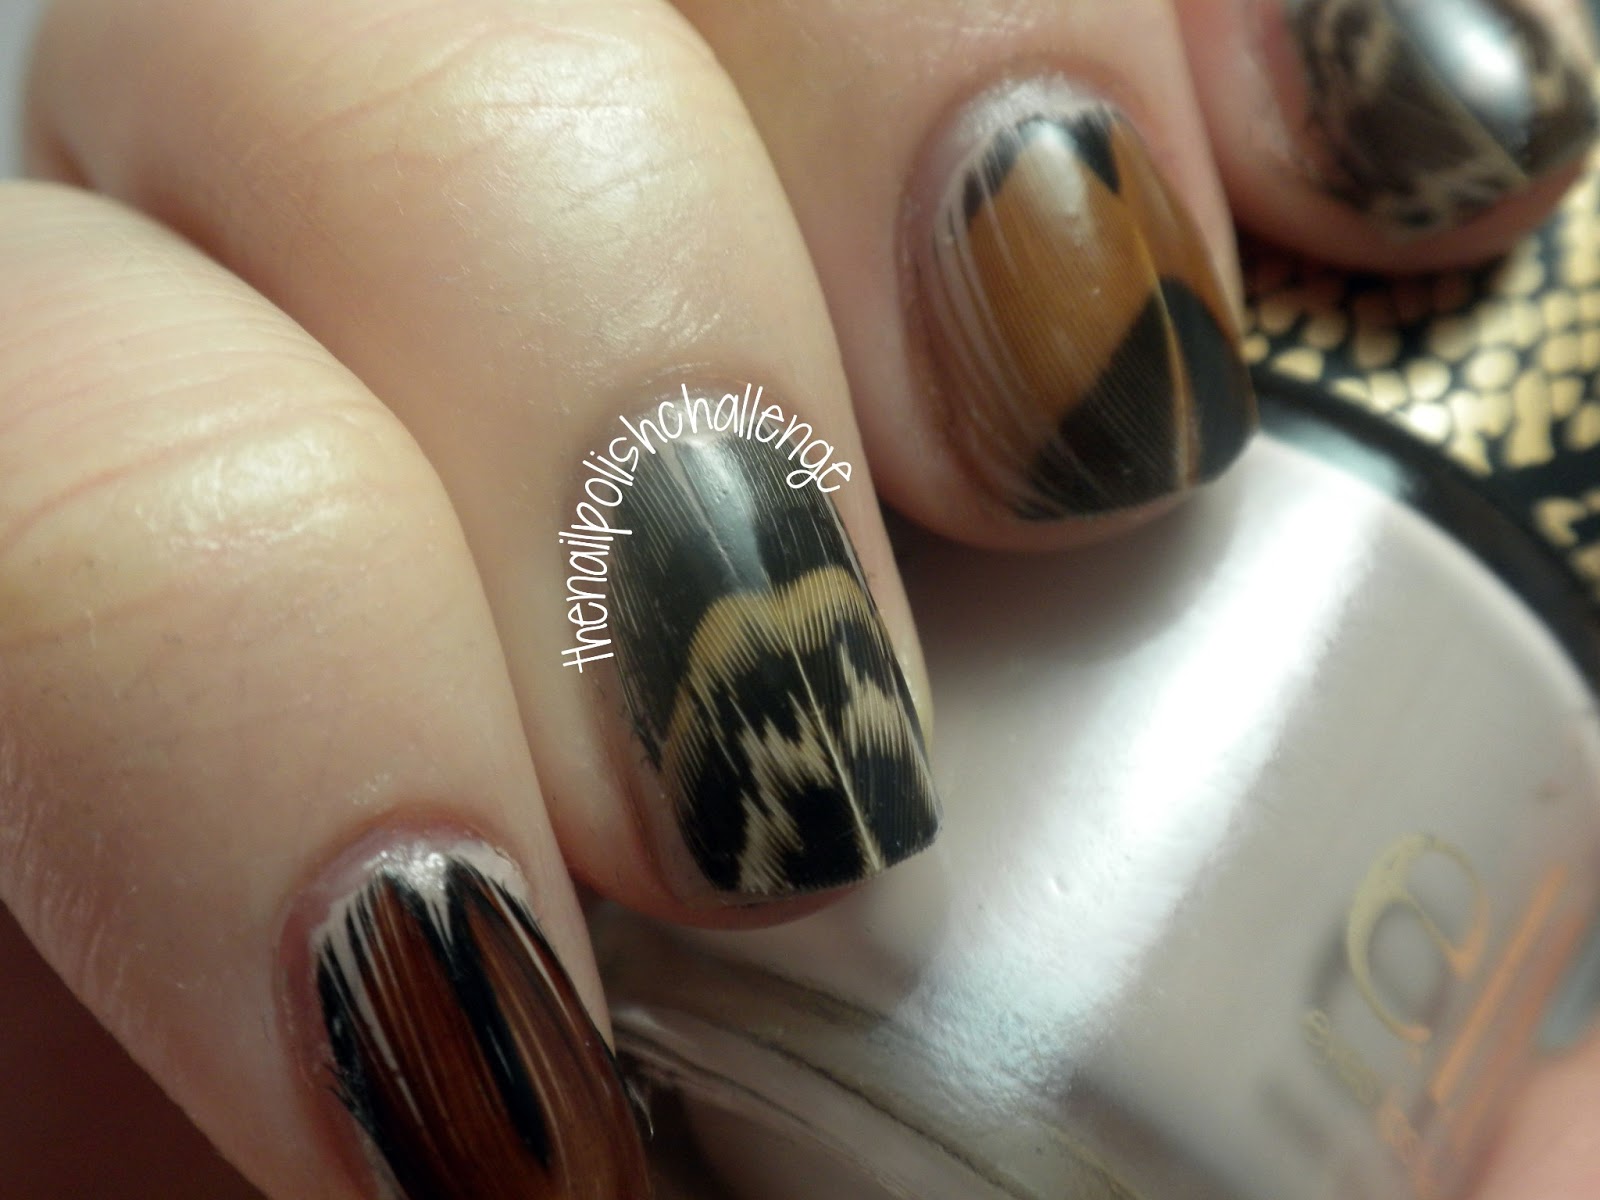
I tried doing the tutorial that the Nailasaurus has on her blog and did feathers on my nails!
I used an e.l.f. nude base and I got feathers from a craft store! Enjoy.
I tried doing the tutorial that the Nailasaurus has on her blog and did feathers on my nails!
I used an e.l.f. nude base and I got feathers from a craft store! Enjoy.
13 October 2012
Apple Picking Manicure!
Today me and a bunch of friends went apple picking, and I did my nails as per Rebecca Likes Nails.
Unfortunately, I somehow messed up one of my outlets when I tried to turn on some lamps to take photos, so I could only take these.
I totally love these! And I had so much fun picking apples. Here are a couple of photos of me apple picking for you guys to be jealous of ;)
Me holding a delicious apple (before eating it!)
Me! With my friend in the background mid bite haha
Me and my cute boyfriend ;)
Unfortunately, I somehow messed up one of my outlets when I tried to turn on some lamps to take photos, so I could only take these.
I totally love these! And I had so much fun picking apples. Here are a couple of photos of me apple picking for you guys to be jealous of ;)
Me holding a delicious apple (before eating it!)
Me! With my friend in the background mid bite haha
Me and my cute boyfriend ;)
11 July 2012
Camo Nails!
So today I have my own interpretation of a manicure from Nails by Kayla Shevonne, an incredible blogger who has some really unique ideas for nails. You can view the tutorial for this manicure here.
I'm not sure what this pattern would be called, but I think it kind of looks like camouflage! I chose OPI Suzi Says Feng Shui for the main color on my nails, and the pink and turquoise accents are OPI Sparrow Me the Drama and China Glaze For Audrey.
Instead of a detail brush, as the tutorial suggested, I ended up using my trusty dotting tool for the stripes and I think it worked really well for this. The best part of the manicure is that since it is so abstract, it is impossible to mess up!
I really love the way it turned out. What do you guys think?
10 June 2012
Day 10: Gradient Nails
Today was my second try at making a gradient nail. I followed the Nailasaurus's tutorial for this one, but this time I paid closer attention to the steps.
This was a little bit harder than I expected. I used OPI Skull and Glossbones as a base, and then China Glaze For Audrey for the gradient. It was a really soft color, so the gradient wasn't that obvious. But that is what I was going for, because last time I tried, the colors clashed pretty badly!
I'll just keep practicing haha!
And yeah, I know I have been bad with this challenge lately. But I don't like following rules :P
This was a little bit harder than I expected. I used OPI Skull and Glossbones as a base, and then China Glaze For Audrey for the gradient. It was a really soft color, so the gradient wasn't that obvious. But that is what I was going for, because last time I tried, the colors clashed pretty badly!
I'll just keep practicing haha!
And yeah, I know I have been bad with this challenge lately. But I don't like following rules :P